Wow! Nearly a year has gone by since my last post. My last post was about the first Bay Area Lego convention, "Bricks by the Bay". And now that convention is coming up again in March! Sadly I won't be attending due to the good news in the next paragraph.
Since my last post my life has changed dramatically. Shortly after posting about BBTB, my wife and I got the great news that we will be expecting our first child in late December! We started planning and preparing for our new addition. We ended up moving to a larger apartment to have more space for our baby at the end of August. We are really happy with our new place and are even more excited for our baby to come.
Our daughter was born a week late and has been the greatest joy in my life since then. I'm glad to say that both my wife and my baby are doing great! Now when she is older I have a great excuse to go to Legoland and hopefully the MMB at the Lego store.
Enough excuses all ready. Back to posting about everyone's favorite hobby, Lego.
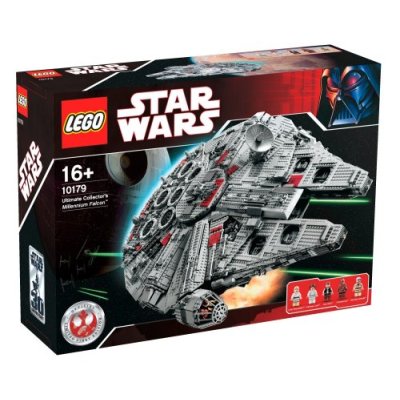
I have still been adding to my collection. Albeit more slowly then before (baby stuff is expensive). The two biggest additions to my collection are the most awesome 6295 - Black Seas Barracuda (picked off eBay for little more then MSRP, w/ box) and 10179 - Millennium Falcon UCS (picked up during the clearance on Lego shop online). Both of these sets have been something I've been wanting for a long time now. 6295 - BSB was a set that I drooled over as a child and never got my hands on. I have yet to put together the 10179. I opened the box and was overwhelmed by the size of this thing. It may be something that I put together in the future with my daughter or I just might get the building itch and spend a week or two building it when I get off work.
I haven't been building too much lately. Time has been a precious commodity and even though we moved to a larger place I still don't have an optimal Lego building area. I did however get more storage and re-organized my parts. I have been seeing a lot of great MoC's lately and I have been wanting to get building. Do you think my daughter will mind if I take up part of her room for Lego? I am going try and make it my resolution to build more with Lego and post more about it. There are just a few other hobbies I need to kick out first. I see that at this point in my life I need to focus on a couple things rather then half ass'ing many things.
So hopefully you will be hearing from me more often. Until then, Keep Bricking.
Showing posts with label organize. Show all posts
Showing posts with label organize. Show all posts
Friday, January 28, 2011


Monday, March 29, 2010
SCORE!!!!
Once again my craigslist monitor has nabbed me another sweet deal. While I was up in Portland this last weekend for my brother's wedding I got 30 pounds of LEGO for $120. That in itself is a great deal at $4 per pound, but mixed into that lot were some truly amazing sets. First, set 10182 Cafe Corner, 10123 Cloud City, 10185 Green Grocer, 6209 Slave I, 7785 Arkham Asylum. Now not all of those are 100% complete. Particularly Arkham Asylum is only 25% or so and there are some missing minifigs, namely the printed legs and arms Boba Fett. Still, this is one of the best finds I have come across in a long time. All the parts are clean and look pretty much brand new. The kid that had these sure did take care of them. I plan on keeping most of this lot, but my wife is starting to tell me we are running out of room to store my LEGO. I plan on bagging up one gallon bags and selling off what I don't keep. Pics will be posted soon.
Sunday, March 21, 2010
LEGO Whitening Guide

I posted about this on here before but I thought I should do a more in depth guide for this process strictly from a LEGO user's point of view. First I must give credit to the guy's over on Retr0Bright's site. These are the people that pioneered this process and have perfected it for everyone else to use. Also thanks to The Brothers Brick for posting about it last year. I would have never found out about it if it wasn't for them. Now on to it.
If you are like me you have a bag of parts that have been exposed to the Sun for too long and are now yellow-y. This process will reverse the effect of UV light and change those yellowed bricks back to their original color. I will try and answer any questions about this process in this guide. The picture at the top shows a well-yellowed 1x4 brick and the same brick after 2 1/2 hours.

What do I need?
- Hydrogen Peroxide (H2O2) between 3% and 12% (10 - 40 volume)
- An "Oxy" detergent
- Sunlight or UV light
- Plastic gloves
- A container large enough to hold the solution and your bricks (preferably Glass or clear plastic)
- A measuring cup that goes up to 500 ml
- Yellowed bricks

That's it. There is another recipe for the solution that involves Xanthum Gum and blending it to make more of a paste but I found that a straight liquid works fine for LEGO. Make sure that the Peroxide is the clear/ liquid form and NOT the cream form. The cream has added chemicals such as Terpene which will harm the LEGO. Most "Oxy" detergents will work. The ingredient we are looking for is tetra acetyl ethylene diamine or TAED. Now some detergents don't list this as an ingredient but if it says Sodium Precarbonate and Sodium Carbonite you're good.

Sunlight or UV light is also needed. The UV blacklight should be UV-A with a range of 300 - 350nm. That is the ideal range to get the process going.
The Recipe
- 500ml of H2O2
- 1/4 tsp of "Oxy" detergent
First put on your gloves. Best way to do this is measure and pour the H2O2 into the container. Then add the 1/4 tsp of Oxy to a small amount of warm water to help it dissolve then mix the Oxy and water into the H2O2. Adding a little water won't do anything to the process. It will dilute it just a little but not enough to effect anything.


Once it is mixed together the reaction is starting and you need to add your LEGO parts. A trick to make it so the parts don't float is to dip them in slowly so all air bubbles get filled in. Or submerge them in water first then put them in the H2O2.

Now wait. Depending on severity of discoloration and strength of the H2O2 it can take anywhere from 2 hours to 24 hours to reverse the damage. Check every few hours to see if everything is ok. If you see tiny bubbles forming on the parts then you know it is working.

When you see parts that are done. Get them out and rinse them off. Set them aside with a fan to dry them quicker. Enjoy your new looking older bricks!
DO's and DON'Ts
DO - keep an eye on everything. Check every few hours to submerge any floaters and to pull out parts that look done.
DO - use this on printed parts. If the printing is in good shape there shouldn't be a problem but if the printing is old and worn you might see some fading.
DO - set your container on tin foil. This will help reflect the light back into the LEGO.
DON'T - put any metal parts in (wheel axles). The Oxy will eat at the metal and turn to rust
DON'T - leave in a hot place. Yes you want it in the sun, but if it gets too hot the plastic can warp
DON'T - use more then a 1/4 tsp of Oxy. Using more won't make it go faster. In fact it won't do anything but waste your detergent.
For more questions, look at the FAQ in the next post.
LEGO Whitening FAQ
If your question isn't answered here, comment and I will try my best to answer it.
Where do I buy Hydrogen Peroxide?
H2O2 can be found in many places. Your local drug store will probably carry a 3% solution. Larger percentages can be found at beauty supply stores. Sally's is a worldwide chain and it is where I get mine. Remember to only get the "clear" kind and NOT "cream". Also 10 volume = 3%, 40 volume = 12%.
Does this only work on White?
No. I have had success using this on blue, old gray, and trans clear. I will warn you though, blue and old gray need to be watched. If left in too long the will become bleached. Or as the guys on Retr0Bright call it "bloom". So be careful with blues and old grays.

Will this fade printed bricks?
Usually No. If the printing is in good condition it should hold up to the process. If the printing is all ready faded or worn it may suffer more fading. All my printed parts have turned out ok. My suggestion is to test this for yourself.

Does the solution last forever?
No. Once the Oxy detergent has been mixed in with the H2O2 the process has started and the Hydrogen is being depleted. Once all the Hydrogen is gone, it will no longer work.
Why leave it in the Sun? Isn't it what started the whole thing?
True, the UV light made your parts turn yellow. But the UV light is what makes this process reverse itself. The UV light gets the Bromine atoms excited again but this time instead of oxygen we are force feeding it hydrogen. See next question.
How does this work?
LEGO bricks are made from ABS plastic. A common chemical found in ABS from the 80's to late 90's is Bromine. Bromine is a flame retardant and its natural color is brown. UV light degrades Bromine and it attaches to oxygen atoms. These brominated chemicals start to move around in the plastic, usually coming to the surface, and show their natural brown color. The solution and UV light break down these radical Bromine atoms and replace the unstable oxygen atom with a more stable hydrogen atom. That was the really brief explanation, for a more scientific one head over to Retr0Bright.
Why use Gloves?
Hydrogen Peroxide can burn your skin. Using plastic gloves will protect you and allow you to work more easily with the solution.
Is it bad if the LEGO is floating?
Kind of. Try your best to submerge all the parts and get rid of any air bubbles. Toothpicks work wonderfully there. If the solution isn't touching the plastic it won't work. So if it is out of it, nothing will happen.
Will this Oxy detergent work?
My advice is to check on Retr0Bright. They have tried many different brands and have answered this question many times over there.
How much does this cost?
Not a lot. 950ml of H2O2 is less then $6 and the Oxy detergent (which my wife all ready uses so we have it) is less then $10.
My part is taking forever, is it working?
Weaker H2O2 (3%) will take longer then stronger (12%) ones. Also if the part is really yellow, it will take longer. I have noticed that the thinner the plastic the faster it goes. So an old Pirate Flag will take less time then a 2x8 Brick.

Can I leave this going over night?
Yes. If you are using a UV lightbulb feel free to keep this going. If you are just using the sun not much will change in the dark. Remember to watch blues and old grays.
Are these bricks now immune to UV?
No. These bricks are not immune to UV. They can get yellowed if left in UV light. So please take care of your LEGO.
Where do I buy Hydrogen Peroxide?
H2O2 can be found in many places. Your local drug store will probably carry a 3% solution. Larger percentages can be found at beauty supply stores. Sally's is a worldwide chain and it is where I get mine. Remember to only get the "clear" kind and NOT "cream". Also 10 volume = 3%, 40 volume = 12%.
Does this only work on White?
No. I have had success using this on blue, old gray, and trans clear. I will warn you though, blue and old gray need to be watched. If left in too long the will become bleached. Or as the guys on Retr0Bright call it "bloom". So be careful with blues and old grays.
Will this fade printed bricks?
Usually No. If the printing is in good condition it should hold up to the process. If the printing is all ready faded or worn it may suffer more fading. All my printed parts have turned out ok. My suggestion is to test this for yourself.
Does the solution last forever?
No. Once the Oxy detergent has been mixed in with the H2O2 the process has started and the Hydrogen is being depleted. Once all the Hydrogen is gone, it will no longer work.
Why leave it in the Sun? Isn't it what started the whole thing?
True, the UV light made your parts turn yellow. But the UV light is what makes this process reverse itself. The UV light gets the Bromine atoms excited again but this time instead of oxygen we are force feeding it hydrogen. See next question.
How does this work?
LEGO bricks are made from ABS plastic. A common chemical found in ABS from the 80's to late 90's is Bromine. Bromine is a flame retardant and its natural color is brown. UV light degrades Bromine and it attaches to oxygen atoms. These brominated chemicals start to move around in the plastic, usually coming to the surface, and show their natural brown color. The solution and UV light break down these radical Bromine atoms and replace the unstable oxygen atom with a more stable hydrogen atom. That was the really brief explanation, for a more scientific one head over to Retr0Bright.
Why use Gloves?
Hydrogen Peroxide can burn your skin. Using plastic gloves will protect you and allow you to work more easily with the solution.
Is it bad if the LEGO is floating?
Kind of. Try your best to submerge all the parts and get rid of any air bubbles. Toothpicks work wonderfully there. If the solution isn't touching the plastic it won't work. So if it is out of it, nothing will happen.
Will this Oxy detergent work?
My advice is to check on Retr0Bright. They have tried many different brands and have answered this question many times over there.
How much does this cost?
Not a lot. 950ml of H2O2 is less then $6 and the Oxy detergent (which my wife all ready uses so we have it) is less then $10.
My part is taking forever, is it working?
Weaker H2O2 (3%) will take longer then stronger (12%) ones. Also if the part is really yellow, it will take longer. I have noticed that the thinner the plastic the faster it goes. So an old Pirate Flag will take less time then a 2x8 Brick.
Can I leave this going over night?
Yes. If you are using a UV lightbulb feel free to keep this going. If you are just using the sun not much will change in the dark. Remember to watch blues and old grays.
Are these bricks now immune to UV?
No. These bricks are not immune to UV. They can get yellowed if left in UV light. So please take care of your LEGO.
Wednesday, September 9, 2009
Collection 2.0
Since I last posted on my the state of my collection, it has gone through a significant change. I no longer keep my individual sets separate. This means I have abandoned my views of being a set purist and have gone in the complete opposite direction by throwing all my pieces together.
This decision came when I realized I was holding myself back creatively. By having my sets separate I wasn't able to see all my pieces and there for didn't use my parts very efficiently. By combining all my sets, I can see how many of what piece I have. My collection is still very organized and each part has its place. I can still build my sets if I want. I'm excited for the change and can't wait to try my hand in some MOC's. Now I just need a place to keep all my LEGO out and not have to worry about storing them in the closet. That dream is getting closer to reality, soon hopefully.
I will post new pics of my collection soon. Maybe this weekend, when I have time to get it all together again.
This decision came when I realized I was holding myself back creatively. By having my sets separate I wasn't able to see all my pieces and there for didn't use my parts very efficiently. By combining all my sets, I can see how many of what piece I have. My collection is still very organized and each part has its place. I can still build my sets if I want. I'm excited for the change and can't wait to try my hand in some MOC's. Now I just need a place to keep all my LEGO out and not have to worry about storing them in the closet. That dream is getting closer to reality, soon hopefully.
I will post new pics of my collection soon. Maybe this weekend, when I have time to get it all together again.
Monday, September 7, 2009
LEGO Resto
So I mentioned a few posts back about completely removing the yellowing off LEGO pieces that were exposed to UV light. This weekend I got to try it out. First off read my other post and check out the links it provides.
This process involves using high percentages of hydrogen peroxide so please be careful when doing this. Take the necessary precautions to avoid getting hurt.
Here are a few of my results.
After doing a bunch of white pieces I decided to try it on a printed piece. Some people have said that printed parts tend to fade. I thought since this flag had a lot printed on it and it was in good shape that it should be fine. This flag took about 2 hours. I think since the plastic is pretty thin that it went a lot faster.
I have seen some people reverse the yellow in clear plastic items. So I thought to try it on my clear LEGO parts. I have a few of these slopes all in the same condition. I had thought they were just really dirty and stained. Turns out it was just yellowed from UV. This part took about 6 hours. This slope is at least 25+ years old, now it looks like brand new.
I will be posting more results on my flickr page. So please add me as a contact to see new updates.
This process involves using high percentages of hydrogen peroxide so please be careful when doing this. Take the necessary precautions to avoid getting hurt.
Here are a few of my results.
After doing a bunch of white pieces I decided to try it on a printed piece. Some people have said that printed parts tend to fade. I thought since this flag had a lot printed on it and it was in good shape that it should be fine. This flag took about 2 hours. I think since the plastic is pretty thin that it went a lot faster.

I have seen some people reverse the yellow in clear plastic items. So I thought to try it on my clear LEGO parts. I have a few of these slopes all in the same condition. I had thought they were just really dirty and stained. Turns out it was just yellowed from UV. This part took about 6 hours. This slope is at least 25+ years old, now it looks like brand new.

I will be posting more results on my flickr page. So please add me as a contact to see new updates.
Wednesday, March 4, 2009
Storage!!
I want to talk about the system that I use for storing my Lego. From the pictures, two main features are seen. The plastic drawer cabinet and white boxes. Every set I own gets put in a white box (if I have enough). My bulk lot go into the plastic drawers. Where each drawer is a separate Lego element. In the pictures of my collection you see 4 units. Last weekend I went out and bought two more of the 18 drawer unit. So total I have 3 - 39 drawer and 3 - 18 drawer units.


These are the main part of my storage. Sold by many home improvement stores as tool storage. They work perfect for Lego. I would be surprised if an AFOL hasn't used these. They are a nice compact size but are deep enough to hold bricks and plates up to 16 studs long. A minor complaints about these, they don't come with drawer dividers. The drawers themselves can accommodate a plastic divider to cut the drawer in half, but the Stack On brand models don't come with them naturally. You can buy dividers separately but they are expensive. Most people resort to business cards or cardboard and make their own. There are 3 models in the size pictured with a different number of drawers: 18, 39 and 60. Brands like Stack On and Akro Mils make smaller models which are about half the overall size of these. They have the ability to mounted on a wall but you need to supply the hardware for that. Being as they are made for small tools and parts they can easily hold any number of Lego you put in them. Don't tip these over though as your parts will fly all over the place. Depending on how many drawers and where you buy them, they cost around $15 - $25. Kmart has the 18 and 60 drawer models for $15 and $17.
 The other part of my storage are these white boxes. These are sold by Ikea and are meant to store CD's. I found they are perfect for any size Lego set. They won't be able to hold any base plates though. Ikea used to sell a wider and shorter box but have discontinued them. The shorter box fit any size base plate and had plenty of room for the rest of the set. Anyways the current model is W 6 ¼" x D 10 ¼"x H 6". Being from Ikea you need to put them together which can take some time if you have 20 or more. The display tag works great for the set name or set number or both. One downside to these is that after you build them the bottom corners naturally have a hole, which can be bad for those pesky 1 x 1 round plates. My solution are 1" round mailing stickers from any office supply store. Just push those into the corners on the inside of the box and you have a fully sealed Lego box. The best part, 2 for $7.
I have lots of ideas for my storage system, one of which I have been working on for a few weeks. It's a surprise and I won't be able to reveal it until late this summer. I hope this information helps any new AFOL passing by. There are plenty of storage systems these are just the ones that work for me.
 The other part of my storage are these white boxes. These are sold by Ikea and are meant to store CD's. I found they are perfect for any size Lego set. They won't be able to hold any base plates though. Ikea used to sell a wider and shorter box but have discontinued them. The shorter box fit any size base plate and had plenty of room for the rest of the set. Anyways the current model is W 6 ¼" x D 10 ¼"x H 6". Being from Ikea you need to put them together which can take some time if you have 20 or more. The display tag works great for the set name or set number or both. One downside to these is that after you build them the bottom corners naturally have a hole, which can be bad for those pesky 1 x 1 round plates. My solution are 1" round mailing stickers from any office supply store. Just push those into the corners on the inside of the box and you have a fully sealed Lego box. The best part, 2 for $7.
I have lots of ideas for my storage system, one of which I have been working on for a few weeks. It's a surprise and I won't be able to reveal it until late this summer. I hope this information helps any new AFOL passing by. There are plenty of storage systems these are just the ones that work for me.
Friday, February 20, 2009
My WHOLE Collection!!
This is the first time that I have finally got around to photographing my ENTIRE collection. I have it stored in so many different places (being I'm in a small San Francisco Apt), but I think I gathered everything up. Just a refresher: 76 unique sets and over 30,000 pieces. 5 sets are not pictured because they are currently on my desk at work. Here it is...


Some readily assembled sets that I keep on display around the apartment.

I was amazed on how much there actually is. Here is my set list:
There's a 3 year gap from when I lost touch with Lego and fell more into computer hobbies. It's funny because that coincides with my sophomore through senior year in high school.
The ones at my work are: 8652, 10175, 6273, 6205, 8699. There are some instructions shown in the pictures that are not on my list. Reason for this is I plan on keeping them apart of my bulk pieces and not as sets.
Here are some key points to my collection. I keep my bulk in plastic drawer containers. Each drawer holds a different piece and in some cases different colors. I need more containers though as all the plastic bags on the left of the first picture are overflow. The white boxes on the right are from Ikea (though they no longer carry that size :( ). Each one holds a different set unless stated otherwise on the tag. The small boxes in front center are homemade. They each hold a small set. The plastic bags on the right are all sets that don't have a box yet. The red Lego tub is all Bionicle parts. I try to keep every box for my sets if I have room to store them. When I can't I just cut out the box top. That's about it, I plan on goin on a little further on those plastic drawer contianers in another post.

This is a 3" binder that I keep all my instructions in. I need to get another one though, this one is bursting.

This is the container I keep my NXT in. I had to cut out a section to make the control brick fit in. I'm really happy how it turned out.

Some readily assembled sets that I keep on display around the apartment.

I was amazed on how much there actually is. Here is my set list:
| Set # | Name | Parts | Figs | Price | Year | Qty |
| 6624 | Delivery Van | 34 | 1 | ? | 1983 | 1 |
| 6623 | Police Car | 40 | 1 | ? | 1983 | 1 |
| 6882 | Walking Astro Grappler | 86 | 1 | ? | 1985 | 1 |
| 392 | Fire Engine | 23 | 1 | ? | 1986 | 1 |
| 390 | Helicopter | 24 | 1 | ? | 1986 | 1 |
| 5580 | Highway Rig | 637 | 0 | ? | 1986 | 1 |
| 6521 | Emergency Repair Truck | ? | 1 | ? | 1987 | 1 |
| 6380 | Emergency Treatment Center | 284 | 5 | 29.75 | 1987 | 1 |
| 6522 | Highway Patrol | ? | 2 | ? | 1987 | 1 |
| 6054 | Forestmen's Hideout | 198 | 2 | 17.5 | 1988 | 1 |
| 6675 | Road & Trail 4 X 4 | 79 | 1 | ? | 1988 | 1 |
| 6235 | Buried Treasure | 20 | 1 | 3.25 | 1989 | 1 |
| 6274 | Caribbean Clipper | 372 | 4 | 54 | 1989 | 1 |
| 6257 | Castaway's Raft | 50 | 3 | 8.5 | 1989 | 1 |
| 6276 | Eldorado Fortress | 496 | 8 | 66 | 1989 | 1 |
| 6270 | Forbidden Island | 176 | 4 | 37.5 | 1989 | 1 |
| 8835 | Forklift | 240 | 0 | ? | 1989 | 1 |
| 6481 | Light & Sound Construction Crew | 168 | 2 | 27 | 1989 | 1 |
| 6661 | Mobile TV Studio | 71 | 1 | ? | 1989 | 1 |
| 8854 | Power Crane | 508 | 0 | ? | 1989 | 1 |
| 6245 | Harbor Sentry | 24 | 1 | 4.25 | 1990 | 1 |
| 6396 | International Jetport | 485 | 8 | 69.75 | 1990 | 1 |
| 6811 | Pulsar Charger | 25 | 1 | 3 | 1990 | 1 |
| 6260 | Shipwreck Island | 69 | 2 | 12 | 1990 | 1 |
| 6956 | Stellar Recon Voyager | 221 | 2 | 36 | 1990 | 1 |
| 6593 | Blaze Battler | 116 | 1 | ? | 1991 | 1 |
| 6259 | Broadside's Brig | 64 | 3 | 8.75 | 1991 | 1 |
| 6679 | Dark Shark | 78 | 2 | ? | 1991 | 1 |
| 6669 | Diesel Daredevil | 84 | 1 | 8.75 | 1991 | 1 |
| 6531 | Flame Chaser | 51 | 1 | ? | 1991 | 1 |
| 6440 | Jetport Fire Squad | 84 | 2 | 27.5 | 1991 | 1 |
| 6542 | Launch & Load Seaport | 1022 | 7 | ? | 1991 | 1 |
| 4021 | Police Patrol | 185 | 3 | 34 | 1991 | 1 |
| 6273 | Rock Island Refuge | 372 | 7 | 66 | 1991 | 1 |
| 6933 | Spectral Starguider | 204 | 2 | 25 | 1991 | 1 |
| 8815 | Speedway Bandit | 77 | 0 | ? | 1991 | 1 |
| 1477 | Unnamed - Part of 1476 5-Item Bonus Pack | 34 | 1 | ? | 1991 | 1 |
| 6286 | Skull's Eye Schooner | 892 | 9 | 126.5 | 1993 | 1 |
| 6595 | Surf Shack | 88 | 3 | ? | 1993 | 1 |
| 8042 | Universal Pneumatic Set | 226 | 0 | 38.5 | 1993 | 1 |
| 6246 | Crocodile Cage | 56 | 2 | 7.25 | 1994 | 1 |
| 6278 | Enchanted Island | 412 | 7 | 66 | 1994 | 1 |
| 6264 | Forbidden Cove | 207 | 4 | 29.75 | 1994 | 1 |
| 5591 | Mach II Red Bird Rig / Mach II Red Bird | 1166 | 0 | 110 | 1994 | 1 |
| 6339 | Shuttle Launch Pad | 536 | 4 | 66 | 1995 | 1 |
| 6625 | Speed Trackers | 56 | 2 | 6.75 | 1996 | 1 |
| 8445 | Indy Storm / Formula 1 Racer | 440 | 0 | 40 | 1999 | 1 |
| 5925 | Pontoon Plane | 71 | 1 | 6 | 1999 | 1 |
| 8448 | Super Street Sensation / Super Car Mk II | 1408 | 0 | 130 | 1999 | 1 |
| 10020 | Santa Fe Super Chief | 436 | 2 | 40 | 2002 | 1 |
| 4511 | High Speed Train | 333 | 3 | 90 | 2003 | 1 |
| 10027 | Train Engine Shed | 633 | 2 | 70 | 2003 | 1 |
| 10128 | Train Level Crossing | 325 | 2 | 50 | 2003 | 1 |
| 8782 | Danju | 46 | 0 | 8 | 2004 | 1 |
| 8802 | Dark Fortress Landing | 142 | 2 | ? | 2005 | 1 |
| 8652 | Enzo Ferrari 1:17 | 477 | 0 | 40 | 2005 | 1 |
| 8801 | Knights' Attack Barge | 163 | 2 | ? | 2005 | 1 |
| 7246 | Mini Digger | 36 | 1 | 3 | 2005 | 1 |
| 7242 | Street Sweeper | 63 | 1 | 5 | 2005 | 1 |
| 4891 | Highway Haulers | 209 | 0 | 10 | 2006 | 1 |
| 8527 | Mindstorms NXT | 577 | 0 | 250 | 2006 | 1 |
| 4894 | Mythical Creatures | 588 | 0 | 30 | 2006 | 1 |
| 7903 | Rescue Helicopter | 245 | 3 | 20 | 2006 | 1 |
| 6206 | TIE Interceptor™ | 212 | 1 | 20 | 2006 | 1 |
| 6205 | V-Wing Fighter | 118 | 1 | 10 | 2006 | 1 |
| 10175 | Vader's TIE Advanced | 1212 | 0 | 100 | 2006 | 1 |
| 4939 | Cool Cars | 206 | 0 | 10 | 2007 | 1 |
| 4953 | Fast Flyers | 312 | 0 | 20 | 2007 | 1 |
| 4915 | Mini Construction | 68 | 0 | 5 | 2007 | 1 |
| 4918 | Mini Flyers | 76 | 0 | 5 | 2007 | 1 |
| 8146 | Nitro Muscle | 598 | 0 | 50 | 2007 | 1 |
| 5621 | Coast Guard Kayak | 21 | 1 | 3.5 | 2008 | 1 |
| 4993 | Cool Convertible | 648 | 0 | 45 | 2008 | 1 |
| 7667 | Imperial Dropship | 81 | 4 | 10 | 2008 | 1 |
| 4837 | Mini Trains | 73 | 0 | 5 | 2008 | 1 |
| 8699 | Takanuva | 267 | 0 | 30 | 2008 | 1 |
There's a 3 year gap from when I lost touch with Lego and fell more into computer hobbies. It's funny because that coincides with my sophomore through senior year in high school.
The ones at my work are: 8652, 10175, 6273, 6205, 8699. There are some instructions shown in the pictures that are not on my list. Reason for this is I plan on keeping them apart of my bulk pieces and not as sets.
Here are some key points to my collection. I keep my bulk in plastic drawer containers. Each drawer holds a different piece and in some cases different colors. I need more containers though as all the plastic bags on the left of the first picture are overflow. The white boxes on the right are from Ikea (though they no longer carry that size :( ). Each one holds a different set unless stated otherwise on the tag. The small boxes in front center are homemade. They each hold a small set. The plastic bags on the right are all sets that don't have a box yet. The red Lego tub is all Bionicle parts. I try to keep every box for my sets if I have room to store them. When I can't I just cut out the box top. That's about it, I plan on goin on a little further on those plastic drawer contianers in another post.
Friday, February 6, 2009
Sorting 101, part 2
I finally got around to do some more sorting. Last article I talked about breaking down a large pile of Lego into the smallest number of groups as possible. The best way to do that is to sort them by color. Now that each color is sorted out, I break down each color into types of elements. The number of groups depends on how many different types of elements are in each color group. The most common groups are: bricks, plates, tiles, slopes, wedges, hinges, doors and windows, technic, and modified plates.
To start out, I dump one color out on a blanket. Then just pick through the pile one by one putting the element in the respective pile. Here's a picture of what I ended up with. The 2 largest piles were bricks and plates.

The piles above are (left to right): wedges, panels, bricks, modified plates, hinges, train, modified tile, fence, windows/ doors, brackets, tiles, canopies, supports, plates, technic, and slope. I also found one car jack and one old minifigure legs.


Also, when I go through and sort any Lego I am keeping an eye out for any Mega Block or other non - Lego parts. I bagged up all the separate piles and stored them in their box, until it's time to sort them out even more.
The next step after sorting by type is sorting each type into size. That will be next time.
To start out, I dump one color out on a blanket. Then just pick through the pile one by one putting the element in the respective pile. Here's a picture of what I ended up with. The 2 largest piles were bricks and plates.

The piles above are (left to right): wedges, panels, bricks, modified plates, hinges, train, modified tile, fence, windows/ doors, brackets, tiles, canopies, supports, plates, technic, and slope. I also found one car jack and one old minifigure legs.


Also, when I go through and sort any Lego I am keeping an eye out for any Mega Block or other non - Lego parts. I bagged up all the separate piles and stored them in their box, until it's time to sort them out even more.
The next step after sorting by type is sorting each type into size. That will be next time.
Tuesday, February 3, 2009
Know the Lingo
Before I continue to talk about sorting Lego, I want to share the lingo. Knowing what an element is helps so much when sorting. Also if you have someone helping you find an element, having both people know what something is helps in communication. So, what are some of the elements called? There are bricks, plates, tiles, slopes, windscreens, bars, wedges, wings, and many more. I will be covering the terminology that was been made by sites like peeron.com and bricklink.com. Lego has their own terminology that can be a little confusing.
 Bricks are the basic thick element. In fact the 2 x 4 red brick is the most common Lego out there. Bricks start at a size of 1 x 1 and can be as large as 8 x 16. When I say dimensions like 1 x 1, I am referring to the space the brick takes up, counted in studs. Dimensions are always read low to high. The brick pictured is a 2 x 4 not a 4 x 2.
 Plates are the thinner element. 3 plates stacked on top of each other equal the thickness of one brick. Plates run the size of 1 x 1 to be as long as 16 and as wide as 10. Large 24 x 24 plates are called Base plates.
 Slopes are the angled version of a brick. Slopes are measure a little bit differently on peeron and bricklink. The element pictured is called an 18 4 x 2 Slope Brick. The 18 refers to the degree of the slope. Also note that slopes are called by the direction of the slope. The one pictured is 4 x 2 because the slope is travelling up the longer (4) side. A 2 x 4 slope would look like this:

 Bricks are the basic thick element. In fact the 2 x 4 red brick is the most common Lego out there. Bricks start at a size of 1 x 1 and can be as large as 8 x 16. When I say dimensions like 1 x 1, I am referring to the space the brick takes up, counted in studs. Dimensions are always read low to high. The brick pictured is a 2 x 4 not a 4 x 2.
 Plates are the thinner element. 3 plates stacked on top of each other equal the thickness of one brick. Plates run the size of 1 x 1 to be as long as 16 and as wide as 10. Large 24 x 24 plates are called Base plates.
 Slopes are the angled version of a brick. Slopes are measure a little bit differently on peeron and bricklink. The element pictured is called an 18 4 x 2 Slope Brick. The 18 refers to the degree of the slope. Also note that slopes are called by the direction of the slope. The one pictured is 4 x 2 because the slope is travelling up the longer (4) side. A 2 x 4 slope would look like this:
That is a 33 2 x 4 slope. When I look for slopes I don't think of the angle degree. But you should know the difference between a 4 x 2 and a 2 x 4.
 Tiles are completly flat in most cases and are the ones that can be a pain to find. Tiles will mostly be 1 stud wide. The only sizes of a tile are 1 x 1 - 1 x 8 and 2 x 2. Tiles are usually have a pattern printed on them, so finding a tile with the right print makes it even harder.
Those are the basic groups of elements everyone should know. Now if you want to get more advanced you will know rounds, corners, turntables, wedges, inverted, clips, and canopies.
 Tiles are completly flat in most cases and are the ones that can be a pain to find. Tiles will mostly be 1 stud wide. The only sizes of a tile are 1 x 1 - 1 x 8 and 2 x 2. Tiles are usually have a pattern printed on them, so finding a tile with the right print makes it even harder.
Those are the basic groups of elements everyone should know. Now if you want to get more advanced you will know rounds, corners, turntables, wedges, inverted, clips, and canopies.
all pictures courtesy of peeron
Monday, February 2, 2009
Sorting 101, part 1
If you don't know about craigslist.org, you should go check it out. It has become the place to post your wanted/ for sale ads. It is a great place to find deals on anything, but since this is a Lego blog, we'll talk about the Lego part of it.
Every now and then you come across great finds. Lego popularity will not die down anytime soon and the majority of people posting ads know this. However, a small portion don't know the value of their Lego. Example, I just bought 40 pounds of Lego, 15 baseplates, 15-ish manuals, 100 + minifigs and more for just $120 from a seller on craigslist. Average value for that lot on eBay is around $350 - 400. I will go more into craigslist and eBay in a later post, for now I want show how I go about sorting a large lot of Lego.
Basic methods of sorting Lego usually include, color, type, size, and quality. Anyone can sort the way they want to and as much as they want to. The way I sort works for me and is not necessarily the only way to go.
When dealing with a large quantity of elements, I like to break down the lot into the smallest number of groups possible. I don't want to get overwhelmed right away be sorting the pile into types, (plates, bricks, tiles ...) and have 50 different piles going on. Color is the first sort that I do. You can easily sort a large pile down into 6-8 piles. Here's a picture of the lot that I just got.
 This is all ready sorted out a little bit. I have the bulk of the pile poured out on a blanket, (for easy cleanup) manuals off to the side and have picked out the large pieces ( from a plane). As I said before, I don't want to be overwhelmed by sorting out all the different types of pieces in there. I want to start smaller. Sorting color is probably the fastest way to break up a lot this size. Red, yellow, blue, white, black, gray, clear and wheels are the main groups I sort to first. Through the years Lego has introduced new colors. So my color groups have grown to include "like" colors. For instance, yellow also includes green and lime colors. Here's what my pile looks like now.


 As I sort through, I also keep a look out for any piece that seems "special". Pieces like 9v battery boxes, large canopies, or any element that doesn't look like Lego but is. These usually lead to build an interesting set that I may want to keep together. Also during this first sort, I try and find any non-Lego parts. The world would be a better place if the "Mega Blocks" were gone. Any non-Lego elements find themselves in the trash. So once the first sort is done, I go on to sort by type. That will be next, stay tuned.
Every now and then you come across great finds. Lego popularity will not die down anytime soon and the majority of people posting ads know this. However, a small portion don't know the value of their Lego. Example, I just bought 40 pounds of Lego, 15 baseplates, 15-ish manuals, 100 + minifigs and more for just $120 from a seller on craigslist. Average value for that lot on eBay is around $350 - 400. I will go more into craigslist and eBay in a later post, for now I want show how I go about sorting a large lot of Lego.
Basic methods of sorting Lego usually include, color, type, size, and quality. Anyone can sort the way they want to and as much as they want to. The way I sort works for me and is not necessarily the only way to go.
When dealing with a large quantity of elements, I like to break down the lot into the smallest number of groups possible. I don't want to get overwhelmed right away be sorting the pile into types, (plates, bricks, tiles ...) and have 50 different piles going on. Color is the first sort that I do. You can easily sort a large pile down into 6-8 piles. Here's a picture of the lot that I just got.


 As I sort through, I also keep a look out for any piece that seems "special". Pieces like 9v battery boxes, large canopies, or any element that doesn't look like Lego but is. These usually lead to build an interesting set that I may want to keep together. Also during this first sort, I try and find any non-Lego parts. The world would be a better place if the "Mega Blocks" were gone. Any non-Lego elements find themselves in the trash. So once the first sort is done, I go on to sort by type. That will be next, stay tuned.
Subscribe to:
Posts (Atom)